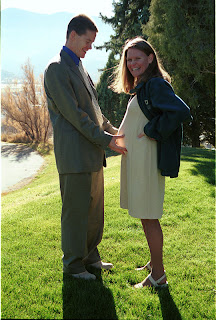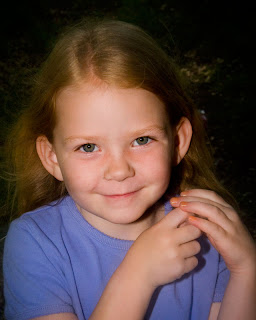


I love my grandchildren. They are just a lot of fun. Yesterday my son and daughter-in-law asked me to find a picture that I had taken of them at the wedding of my third son Hayden. It was one of those images that just happen and you don't know what a treasure that you have until it is processed. This was done before I had my digital camera so I didn't know I had it for a couple of days after it was shot. Had I been shooting with digital I might have tried to do more with other variations. There was no photoshopping done to this image just a lot of things all happening outside of the camera to make it a very interesting image. The sun is coming down from in front of me at a high autumn angle. Jeff is just goofing around with his hands but they end up reflecting the light back on to Lori and the baby she is carrying, my first grandchild Kasia. The light is also reflecting from Lori onto Jeff into the rest of the area between them. I could have never planned it that way even if I had wanted to do it that way. But sometimes as I said all things just come together correctly despite what you may think you know and what you want to try and do.
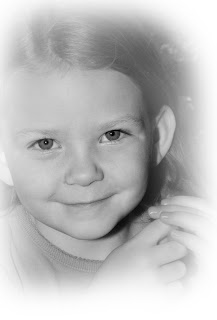
The next two images I put in just to show who came from that experience. I was also asked to explain how it is done when going from a color image to a black and white. So for those of you not interested in the technical part you can stop reading here.
The image is taken into photoshop and any blemishes corrected on a new identical layer of the image. Then those two layers are merged into one and another layer created by pressing "command J". I then take that layer and go to the menu bar and select "Image-Mode_LAB" It will then request whether you want to flatten the image. Press "Flatten" ( I have you create a new layer earlier just so that you are always get in the habit of working on a new layer so you have an original layer to fall back to if needed. However here the mode will require you to flatten the image sooner of later no matter what you do in order to get the desired effect). Next open the "Channels" palette and select the Lightness channel. Next go to "Image-Mode" and select "Grayscale". Click OK to discard other channels. This will leave you with the grayscale image that you can work with for the rest of the creation. Now create another new layer. "Command J" and add a new blank layer between the two image layers by pressing Command and selesting the "Create a new layer " icon at he bottom right side of the layers palette next to the garbage icon. With "white" selected as the background layer color press "Command Delete" to fill the blank new layer with white. Next select the top layer and add a "new layer mask". It will need to be filled with black so add it by pressing the "Option " key and selecting the new layer mask icon on the layers pallet. (Third icon from the left.) This will make your image turn all white since you are hiding the top layer behind the mask.
At this point press the letter "B" on your keyboard to select the brush tool that you will need to paint back in the parts of the image that you want. With a large soft brush (maybe 1000 to 1400 master diameter or whatever size fits with the image resolution with which you are working and a hardness of zero) you will now, with the foreground color to white, paint with white on the black mask. You can paint back in whatever part of the image you want to highlight. Change the brush size as needed by pressing the left or right bracket keys on your keyboard.
Next press "command E" twice to flatten the image and again "command J" to create another new image layer. In this step you will lighten the face on the top layer and then reveal the eyes from the bottom layer to make them darker and to stand out so the first thing the viewer notices are the eyes. Change the brightness of the top layer by pressing "command L" and adjust the center levels slider to the left until you have faded the face to be lighter to your desired level. Add a layer mask again only this time leave it white by just selecting the mask icon. Press the letter "X" on your keyboard to switch the foreground back to "black" and then change your brush size to make it slightly smaller than the eyes and brush in the eyes from the bottom layer by painting with black onto the white layer mask. If you find them to be way to dark go back in your history palette and start over by going back to the step prior to using the brush. This time though drop the opacity of your brush from 100 to 50 and brush back in the eyes again. You can also use your Dodge tool to lighten any parts of the image that may appear too dark such as shadows created by the hair and other areas that might be too dark. The last step is to go back to "image-mode" and select "RGB". Now flatten the image again and do a "Save As" and rename the file so that you do not overwrite your original file. I usually just put a capital "A" at the end of the image name. Then just practice and you might find ways to do this even easier. If you do then let me know.


4 comments:
What a sweet pic of Jeff and Lori. I wish we got to see them more often.
I love that picture of Jeff and Lori too! Pretty cool indeed.
I love the picture of Jeff and Lori too. What a cool picture!
Kent, the light in that picture of Jeff and Lori is amazing! What luck! I think there was probably a little bit of skill involved too though. And Kasia has surely grown up since that last time I saw here. She is darling!
Post a Comment