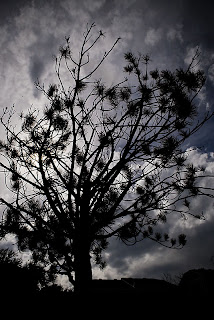
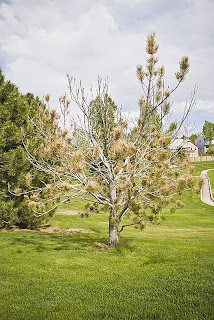
I was in a park behind my son's home in Colorado when I noticed that one of the the trees in the park wasn't looking too healthy. I walked past it several times that day and each time looked at it wondering if there was a way to photograph it so that it would at least be recorded for history before it was removed as I was sure it would happen soon. Then the answer came to me the next day as I was preparing to do some family pictures in the park. I took a picture of it with the sun coming over my shoulder so it could be seen how it was dying and how it would normally be viewed by people passing by it during the day. Then I did a shot into the sun so that it would add a style of suspense to the image that could give a feel of a day or night time shot. This made for a neat image because the branches were without a lot of needles and would thus let a greater amount of the sun be seen through them. (It could even viewed as a full moon shining through the clouds.) It made quite a difference in the image of just a dying tree by looking at it from a different perspective.
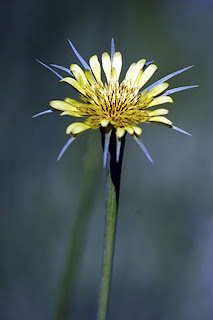
I just added this next couple of images today because they also show a little different perspective as made in photoshop. I was practicing using the pen tool in photoshop for selecting parts of an image to remove and place on their own background. The second picture of the flower was the result. The perspective here is not in the angle or direction of the image but rather the decision to change the background in an image to give it a different feel and appearance.I used a few filters on the first layer of the image after separating out the flower from the background. The filter appears to be a plastic type filter where in reality it was "clouds". I then took that layer and removed the saturation and changed the opacity and a couple of other things as well to achieve what I have here. I doubt that I could repeat it with the same results because , well, it was just an experiment. I might be able to go to the history of actions as recoded in the metadata and come close but even then I doubt it would appear the same. So the lesson to be learned here is to save copies along the way in an experiment and you might even get several images that are fun to display in an art show and they would all be from the same original image.
Friday, June 6, 2008
Thursday, June 5, 2008
Beauty in a rainstrom
Yesterday I was booked to shoot bridals but due to the rainstorm, which is unusual for this area, we rescheduled the shoot. So when I got home and it was raining I decided to go do some of the flowers around my home instead. I recently watched a video, produced I believe by Photovision, where the photographer talked about how he loved the rain and the clouds because they created so many diverse photography opportunities. I have always loved that as well even though you can fake a rainstorm by adding a little water sprayer bottle to your list of camera equipment and then shading the flowers so it looks like the even light of a cloudy day. However that method lacks the authenticity (and ease) of shooting on a truly rainy day. It just doesn't feel the same either since you are not getting wet while doing the shoot. It is fun though and so for several minutes I wandered around the yard in the rain and took the following images. I hope you enjoy them as much as I did in taking them.
Wednesday, June 4, 2008
Beauty of the Sky
Wow, it was so beautiful and all right there in front of my eyes. I often wish that I could see the earth in such a way that I could catch every sunrise and every sunset all the way around the earth. That would just fill my heart with so much happiness though that it would run over and I couldn't probably live through it. Have you ever wondered what it would be like to follow the sun around the world for a week. (It has to be a week at least so that the storms can come and go since they are really what help make a beautiful sun event.) Anyway I was just wondering because the other night I caught all five of these images from the same general area (A radius of probably 30 feet.) and the thought came then that if it was this pretty here what would it be like just a hundred miles further west as it was going down there and then add a hundred to that and well, you can get where my thinking was headed. But then there would be the problem that these images came over a period of an hour and a half so I would have to stop in each place for that period of time to be able to see it all like I did here, and so I guess the best thing is just to enjoy it where you are and to relish that image until you get to see the next one.
Tuesday, June 3, 2008
Photoshop Secret
So here is a little exercise to show a little of photoshops secrets. I have palyed with some of these pictures in photoshop to show the difference in certain steps that can be done with that program.
This image above is an image where I just saved the image more or less that way it was captured by the camera.
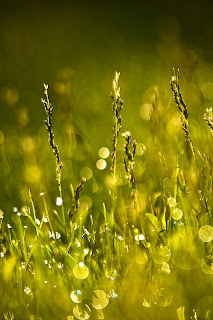
This image above was adjusted in photohop using a levels adjustment. I adjusted the lights and darks to give it a little more contrast. Now I have adjusted all of these images probably more than they should be but that is to help in being able to see the subtle changes that occur in each process. Also I did the same steps in the last three images as I did in the first three.
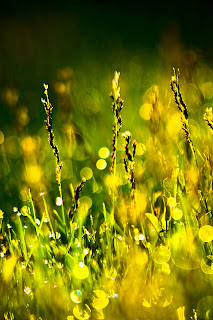
This image above is where I converted the color mode to LAB and did an apply image with the overlay adjustment. The adjustment was also done with LAB not brightness, A, or B. What you will see in these image is the added richness of the color. Normally I would have also dropped the opacity a little but that is all up to the likes of the designer making the adjustments. The color mode is then changed back to RGB before saving the image.
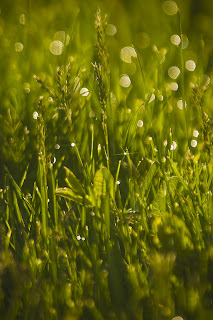
These next three images have the same processes applied as in the first three. The difference here other than composition is that I added a star filter to the camera lens before taking the image.
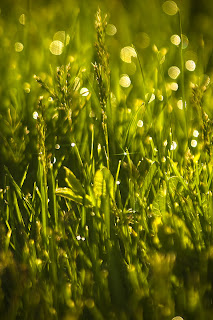
Now it is also up to the eye of the beholder to decide what they like the best. You can choose.
This image above is an image where I just saved the image more or less that way it was captured by the camera.
This image above was adjusted in photohop using a levels adjustment. I adjusted the lights and darks to give it a little more contrast. Now I have adjusted all of these images probably more than they should be but that is to help in being able to see the subtle changes that occur in each process. Also I did the same steps in the last three images as I did in the first three.
This image above is where I converted the color mode to LAB and did an apply image with the overlay adjustment. The adjustment was also done with LAB not brightness, A, or B. What you will see in these image is the added richness of the color. Normally I would have also dropped the opacity a little but that is all up to the likes of the designer making the adjustments. The color mode is then changed back to RGB before saving the image.
These next three images have the same processes applied as in the first three. The difference here other than composition is that I added a star filter to the camera lens before taking the image.
Now it is also up to the eye of the beholder to decide what they like the best. You can choose.
Monday, June 2, 2008
There is a season, be aware
I love to photograph flowers and it seems as though there is always a season with some flower blooming at about any given time. Even in the winter there are the Christmas Catus plants that produce very beautiful flowers it's just too bad that I can't grow them as well as I can photograph them or I would add some images of them as well. Here though is a flower that I have loved all of my life and probably due to the fact that my mother loved them and held them as her favorite flower. (If you could say that she had a favorite flower that is since she seemed to love all kinds.
So last Thursday morning I got into a bad "I gotta photograph mood" so while waiting for time to pass when I would need to leave for Duchesne to photograph the senior class I decided to do some quick shots around my yard and catch the flowers, that were just starting to bloom, with the early morning sunshine both on one side and on the other. These images are the results and you can pick which way that you like them the best.
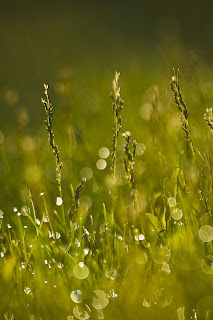
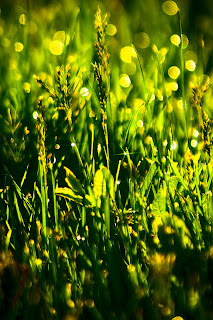
Here is my favorite (below) with the light coming through from the side and the green orchard grass highlighted with yellow sunlight blurred out in the background.So always be aware of the seasons and track them so you know when to go looking for the perfect flower to photograph, no matter who's favorite one it might be. It just may end up being your favorite.
Subscribe to:
Posts (Atom)