So here is a little exercise to show a little of photoshops secrets. I have palyed with some of these pictures in photoshop to show the difference in certain steps that can be done with that program.
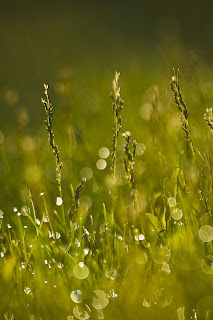
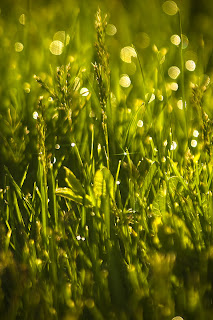
This image above is an image where I just saved the image more or less that way it was captured by the camera.
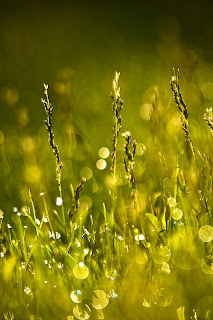
This image above was adjusted in photohop using a levels adjustment. I adjusted the lights and darks to give it a little more contrast. Now I have adjusted all of these images probably more than they should be but that is to help in being able to see the subtle changes that occur in each process. Also I did the same steps in the last three images as I did in the first three.
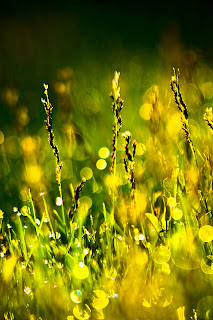
This image above is where I converted the color mode to LAB and did an apply image with the overlay adjustment. The adjustment was also done with LAB not brightness, A, or B. What you will see in these image is the added richness of the color. Normally I would have also dropped the opacity a little but that is all up to the likes of the designer making the adjustments. The color mode is then changed back to RGB before saving the image.
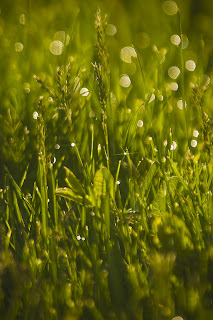
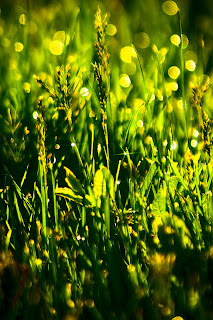
These next three images have the same processes applied as in the first three. The difference here other than composition is that I added a star filter to the camera lens before taking the image.
Now it is also up to the eye of the beholder to decide what they like the best. You can choose.

 This image above is an image where I just saved the image more or less that way it was captured by the camera.
 This image above was adjusted in photohop using a levels adjustment. I adjusted the lights and darks to give it a little more contrast. Now I have adjusted all of these images probably more than they should be but that is to help in being able to see the subtle changes that occur in each process. Also I did the same steps in the last three images as I did in the first three.
 This image above is where I converted the color mode to LAB and did an apply image with the overlay adjustment. The adjustment was also done with LAB not brightness, A, or B. What you will see in these image is the added richness of the color. Normally I would have also dropped the opacity a little but that is all up to the likes of the designer making the adjustments. The color mode is then changed back to RGB before saving the image.
  These next three images have the same processes applied as in the first three. The difference here other than composition is that I added a star filter to the camera lens before taking the image.
 Now it is also up to the eye of the beholder to decide what they like the best. You can choose.

No comments:
Post a Comment